


Table of Contents
- Introduction
- Restart Your Computer and Network Devices
- Check Network Cables and Connections
- Update Your Network Adapter Driver
- Forget and Reconnect to the Network
- Reset Network Settings
- Run Network Troubleshooter
- Disable and Re-enable the Network Adapter
- Check for Windows Updates
- Disable IPv6
- Conclusion
- FAQs
Introduction
Windows 10 is a popular and user-friendly operating system, but like any other technology, it can sometimes encounter issues. One of the common problems that Windows 10 users face is the “Windows 10 Can’t Connect to This Network” error. This frustrating issue can disrupt your work and online activities. However, worry not, as in this comprehensive guide, we will explore 10 effective ways to fix this problem in 2023.
1. Restart Your Computer and Network Devices
The first step in resolving network issues is often the simplest one: a system restart. Begin by rebooting your Windows 10 computer, modem, and router. Sometimes, network issues can be caused by temporary glitches, and a simple restart can clear them.
2. Check Network Cables and Connections
Physical connections are crucial for a stable network. Ensure that all network cables are securely connected to your computer, modem, and router. A loose cable can result in connectivity issues. Also, check for any visible damage to the cables.
3. Update Your Network Adapter Driver
Outdated or incompatible network adapter drivers can be a significant reason for network problems. To resolve this, you should update your network adapter driver to the latest version available.
4. Forget and Reconnect to the Network
Sometimes, your device may have trouble connecting to a specific network. Forgetting the network and then reconnecting can often resolve this issue.
- Go to “Settings.”
- Click on “Network & Internet.”
- Select “Wi-Fi.”
- Click on “Manage known networks.”
- Select the network causing problems and click “Forget.”
Then, try reconnecting to the network by selecting it from the list and entering the password.
5. Reset Network Settings
Windows 10 provides an option to reset network settings to their default configurations. This can help if there are issues caused by network settings that have been altered.
- Go to “Settings.”
- Click on “Network & Internet.”
- Scroll down and select “Network reset.”
- Click “Reset now” and follow the on-screen instructions.


6. Run Network Troubleshooter
Windows 10 has a built-in network troubleshooter that can identify and automatically fix common network issues.
- Go to “Settings.”
- Click on “Update & Security.”
- Select “Troubleshoot” from the left sidebar.
- Click on “Internet Connections” and run the troubleshooter.
Follow the prompts to allow Windows to diagnose and resolve network issues.
7. Disable and Re-enable the Network Adapter
Disabling and then re-enabling your network adapter can refresh your network connection.
- Right-click on the Start button and select “Device Manager.”
- Expand the “Network adapters” section.
- Right-click on your network adapter and choose “Disable.“
- Right-click on it again and select “Enable.”
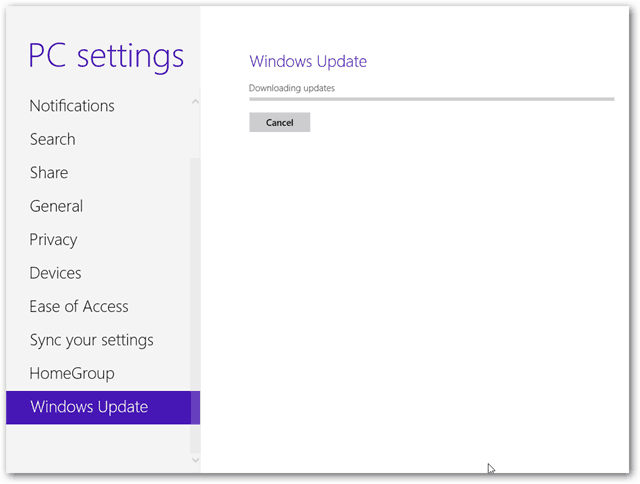
8. Check for Windows Updates
Sometimes, network issues can be resolved by updating your Windows operating system to the latest version. Microsoft regularly releases updates that include bug fixes and improvements.
- Go to “Settings.”
- Click on “Update & Security.”
- Select “Windows Update.”
- Click on “Check for updates.”
Install any available updates and restart your computer if required.


9. Disable IPv6
In some cases, IPv6 can cause network connectivity problems. Temporarily disabling it can help troubleshoot the issue.
- Go to “Network & Internet” settings.
- Click on “Wi-Fi.”
- Scroll down and click on “Change adapter options.“
- Right-click on your Wi-Fi connection and select “Properties.”
- Uncheck the box next to “Internet Protocol Version 6 (TCP/IPv6).”
After applying this change, try reconnecting to the network.


FAQs
Q1: Why can’t my Windows 10 connect to my Wi-Fi network?
A1: Windows 10 may have trouble connecting to a Wi-Fi network due to various reasons, including driver issues, network settings, or network glitches. This guide provides several methods to diagnose and fix the problem.
Q2: Is it necessary to restart my network devices to fix the issue?
A2: While not always necessary, restarting your computer, modem, and router can often resolve temporary network glitches. It’s a simple and quick step that can save you time troubleshooting further.
Q3: How often should I check for Windows updates?
A3: It’s a good practice to check for Windows updates regularly, as they often include important security patches and bug fixes. You can set Windows to check for updates automatically or manually check for updates at least once a month.
Q4: Can disabling IPv6 cause any issues with my network?
A4: Disabling IPv6 is generally safe and can help resolve network connectivity issues. However, IPv6 is becoming more important for the future of the internet, so it’s a good idea to re-enable it once your network issues are resolved.
Q5: What should I do if none of these methods work?
A5: If none of the methods in this guide resolve the issue, consider reaching out to your internet service provider (ISP) for assistance, as there may be a problem with your network connection beyond your control.
Remember to follow these steps carefully, and you should be well on your way to fixing the “Windows 10 Can’t Connect to This Network” issue in 2023.
Conclusion
Dealing with Windows 10 network connection issues can be frustrating, but with the right steps and patience, you can resolve the “Windows 10 Can’t Connect to This Network” error in 2023. These methods cover a wide range of potential problems and should help you get back online swiftly.
For additional support, you can always reach out to the official Windows 10 support channels or consult your device manufacturer’s resources.